Rustic Italian Bread: Easy Recipe for Homemade Perfection
Table of Contents
Rustic Italian Bread: Easy Recipe for Homemade Perfection
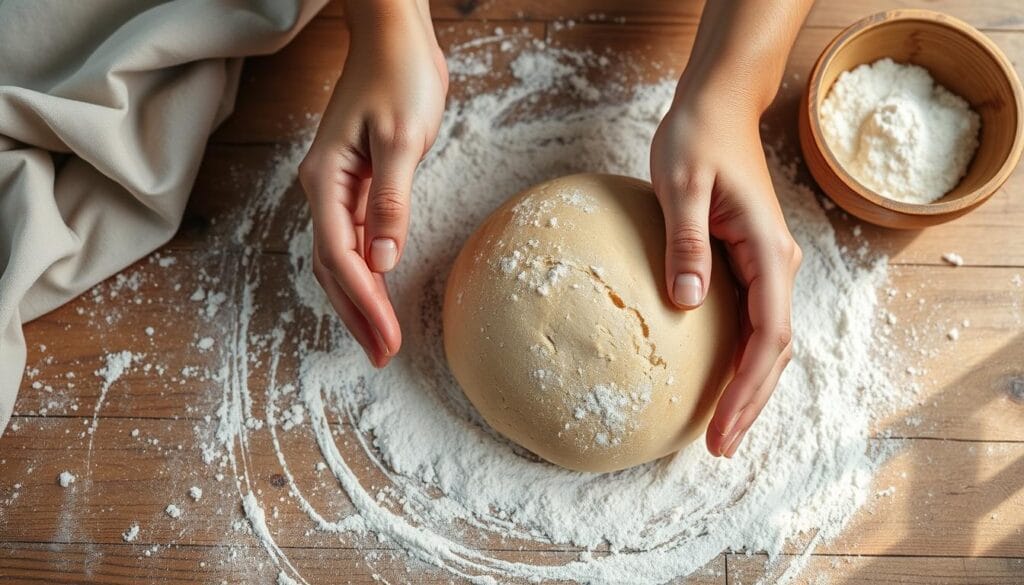
The smell of freshly baked rustic Italian bread can make any kitchen feel cozy. I remember watching my grandmother knead dough with her hands. She made magic with just five simple ingredients. This memory sparked my love for making artisan bread.
Rustic Italian bread is more than just food. It’s an experience. With just five basic ingredients and a little time, you can make a bread that looks like it came from a bakery. This recipe brings the real flavors of Italy to your table, making every bite a celebration.
Key Takeaways
- Rustic Italian bread requires only 5 simple ingredients
- Minimal preparation time with maximum flavor impact
- Perfect for home bakers of all skill levels
- Creates two delicious loaves per batch
- Allows flexible proofing methods
The Art of Traditional Italian Bread Making
Italian bread making is a cherished tradition. It turns simple ingredients into amazing rustic loaves. Each region in Italy has its own bread, showing off local culture and heritage.
Italy has over 300 different bread types. This shows the incredible skill in Italian cooking. Recipes have been shared for generations, telling stories of regional identity and pride.
Understanding Italian Bread Varieties
- Focaccia: A flat oven-baked bread from Liguria
- Ciabatta: A white bread with air pockets
- Pane Toscano: Unsalted bread from Tuscany
- Pane di Altamura: Dense bread from Puglia with PGI status
Key Characteristics of Authentic Italian Bread
Real Italian bread is known for:
- A crispy outside and chewy inside
- High-quality flour, like ’00’ or ‘0’ grade
- A long fermentation time (12-24 hours)
- Just a few ingredients for the best taste
The Role of Simple Ingredients
The beauty of rustic loaves is their simplicity. Traditional Italian bread recipes use just four things: flour, water, salt, and yeast.
“In Italian bread making, less is truly more.” – Traditional Baker’s Wisdom
| Ingredient | Purpose | Typical Quantity |
|---|---|---|
| Flour (’00’ grade) | Structure and texture | 400g |
| Water | Hydration and fermentation | 350g |
| Salt | Flavor enhancement | 1.5 tsp |
| Yeast | Fermentation | 2-4g |
Learning these basics lets you make real, tasty Italian bread at home.
Essential Ingredients for Rustic Italian Bread
Making authentic rustic Italian bread needs the right ingredients and techniques. Each part is key to getting the perfect texture and taste in your homemade loaf.
Choosing the Right Flour Type
Choosing the right flour is crucial for making great olive oil bread. You have a few options:
- All-purpose flour: Versatile and easy to find
- Bread flour: Has more protein for stronger gluten
- Italian 00 flour: The traditional choice for real Italian bread
Yeast and Salt Selection
The quality of your yeast and salt really matters. Fresh active dry yeast helps your bread rise well. Sea salt or kosher salt adds depth to the flavor. Pro tip: Keep salt away from yeast at first to help yeast work better.
The Importance of Water Temperature
Water temperature is very important in making Italian bread. Use lukewarm water (about 110°F) to wake up the yeast. This temperature helps yeast work well and makes the dough strong.
“The secret to great bread lies in understanding how each ingredient interacts.” – Italian Bread Master
Mastering these key ingredients will help you make delicious, authentic rustic Italian bread. Your homemade loaf will be as good as any from a bakery.
Required Equipment and Tools
Making delicious rustic Italian bread at home needs the right tools. You don’t need a wood-fired oven to get great results. Home bakers can use other tools to make amazing bread.
Start by picking the best equipment for your bread. A cast iron pot or dutch oven is key for a crispy crust and soft inside. These pots trap steam, just like a wood-fired oven.
Essential Bread-Making Tools
- Digital kitchen scale (for precise measurements)
- Proofing baskets (6-8 inches recommended)
- Large rectangular mixing tub (14″x15″x5″)
- Bread knife
- Spatula
A dedicated bread mixer can make bread-making easier. It can handle up to 8kg of dough. Good tools make your homemade bread better.
Recommended Baking Equipment
| Tool | Purpose | Recommended Size |
|---|---|---|
| Cast Iron Pot | Steam creation and crust development | 5-7 quarts |
| Proofing Basket | Shaping and rising dough | 6-8 inches |
| Baking Stone | Even heat distribution | 14×16 inches |
Pro tip: You don’t need a wood-fired oven to make great bread. Modern kitchen tools can help you get professional-quality results at home.
“The right tools transform bread-making from a chore to an art.” – Professional Baker’s Wisdom
Making The Perfect Italian Bread Dough
Creating the perfect crusty bread starts with understanding the delicate art of dough preparation. Whether you’re crafting a traditional sourdough bread or a classic Italian loaf, mastering the dough-making process is crucial to achieving bakery-quality results.
Proper Mixing Techniques
To create an exceptional dough, you’ll want to follow these key mixing strategies:
- Start by combining dry ingredients in a large mixing bowl
- Gradually add warm water (80-85°F) to activate the yeast
- Mix at low speed for 2 minutes, then medium speed for 5 minutes
- Ensure consistent hydration throughout the dough
Kneading Methods for Best Results
Kneading develops the gluten network that gives your sourdough bread its signature texture. You have two primary options:
- Hand Kneading: Traditional method requiring physical effort
- Stand Mixer: More efficient and consistent technique
“The windowpane test is your secret weapon for perfect dough consistency” – Professional Bakers
Dough Consistency Tips
Achieving the right dough consistency is an art form. Aim for a slightly sticky texture that passes the windowpane test – where the dough stretches thin enough to allow light through without tearing.
Pro tip: If your dough feels too dry, add water in small increments. For overly wet dough, incorporate additional flour gradually. Remember, crusty bread depends on balanced hydration.
The Science Behind Bread Rising
Learning about bread rising turns simple ingredients into a culinary masterpiece. The fermentation process is a delicate dance of yeast, time, and temperature. It develops complex flavors and creates the bread’s unique texture.
Sourdough bread making uses natural fermentation without commercial yeast. This method involves a fascinating interaction between wild yeasts and lactobacilli bacteria. Here’s what makes the rising process special:
- Natural yeasts create unique flavor profiles
- Longer fermentation develops deeper taste
- Temperature plays a crucial role in dough development
The autolyse period is key in artisan bread making. During this time, flour and water interact to develop gluten structure. Most recipes suggest an autolyse period from 15 to 60 minutes, depending on flour type.
“Bread is not just food; it’s a science that transforms simple ingredients into something magical.” – Artisan Baker
| Flour Type | Autolyse Duration | Gluten Development |
|---|---|---|
| White Flour | 1 hour | Moderate |
| Whole Wheat | 2 hours | Extensive |
| Mixed Grain | 45 minutes | Variable |
Your artisan bread’s success depends on understanding these intricate biological processes. Patience and careful attention to fermentation will reward you with a loaf that’s rich in flavor and perfect in texture.
Rustic Italian Bread Shaping Techniques
Making perfect rustic loaves is more than mixing ingredients. Shaping is an art that turns simple dough into beautiful bread. It’s all about texture and flavor. Learning the right shaping techniques can make your rosemary bread truly special.
Creating the Perfect Loaf Shape
Shaping bread involves several important steps. It’s about building structure and looks. Professional bakers say dough strength is key for great bread. Here are some essential shaping techniques:
- Preshape the dough to make it smooth and organized
- Let the dough relax, growing up to 30% bigger
- Make a tight outer skin to keep the bread strong
- Handle the dough gently to keep its delicate structure
Scoring Patterns and Their Purpose
Scoring is more than just for looks; it’s functional. Different cuts control how the bread grows and look. The bâtard technique, with a long single slash, boosts both looks and texture.

| Bread Shape | Characteristics | Baking Approach |
|---|---|---|
| Baguette | Thin crust, high crust-to-crumb ratio | Short, hot bake time |
| Miche | Thick crust, lower crust-to-crumb ratio | Longer, slower baking |
Tip for home bakers: start with small steps in shaping your rosemary bread. Each try will help you get better at making beautiful, rustic loaves.
Mastering the Baking Process
Making perfect rustic Italian bread is all about mastering the baking art. Traditional Italian baking focuses on creating a real experience. It turns simple ingredients into amazing bread.
Temperature is key when baking rustic bread. Experts say to use a wood-fired oven or a home kitchen setup. The best baking temperature is between 425-450°F (220-230°C). This helps get a golden crust and deep flavor.
“The secret to great bread lies not just in ingredients, but in understanding the precise baking environment.” – Italian Bread Master
- Preheat your oven with a baking stone or dutch oven
- Create steam during the first 10-15 minutes of baking
- Use high temperatures to achieve crispy exterior
- Rotate bread midway for even baking
Steam is very important in Italian baking. Bakers use water sprays or a water-filled tray at the oven’s bottom. This method gives a crisp, crackling crust, just like wood-fired oven bread.
| Baking Stage | Temperature | Duration |
|---|---|---|
| Initial Baking | 450°F | 15-20 minutes |
| Final Baking | 425°F | 10-15 minutes |
Your bread is done when it’s golden-brown and sounds hollow when tapped. Trust your senses and keep practicing to get the hang of baking rustic Italian bread.
Storage and Serving Suggestions
Your homemade rustic olive oil bread needs the right care to keep its crusty texture and flavor. Knowing how to store and serve it will help you enjoy it at its best.
Keeping Your Bread Fresh
Storing your rustic Italian bread is important. At room temperature, it stays fresh for up to 5 days if wrapped right. Freezing is a great option for longer storage.
- Room temperature storage: Keep in a bread box or wrapped in a clean kitchen towel
- Refrigeration is not recommended as it can dry out the bread
- Freeze whole loaves or pre-sliced portions for up to 3 months
Serving and Pairing Suggestions
Your olive oil bread is great for many meals. Italian traditions show many ways to enjoy it.
| Serving Style | Recommended Pairings |
|---|---|
| Appetizer | Olive oil and balsamic vinegar dip |
| Breakfast | Toasted with butter or jam |
| Dinner Side | Alongside pasta or salads |
Creative Leftover Ideas
Turn your day-old crusty bread into tasty dishes:
- Homemade croutons for salads
- Bread pudding
- Rustic Italian breadcrumbs
- Bruschetta base

“Good bread is the most fundamentally satisfying of all foods.” – Elizabeth David
Proper storage keeps your olive oil bread delicious for days.
Conclusion
Making rustic Italian bread at home is more than just cooking. It connects you to centuries of tradition. By learning artisan bread techniques, you get closer to the rich cultural heritage of each loaf.
Creating rustic Italian bread needs patience, practice, and passion. As you try different techniques, you’ll find the unique flavors from natural fermentation. Your homemade bread will taste amazing and be healthier than store-bought bread.
Every loaf has a story. From kneading by hand to the golden crust, your bread is a personal journey. Embrace the imperfections, learn from each try, and share with loved ones. Your skills will turn bread-making into a meaningful and tasty art.
Begin your bread-making journey today. With dedication and the techniques you’ve learned, you’ll make authentic, delicious rustic Italian bread. Buon appetito!
FAQ
What makes rustic Italian bread different from other bread types?
Can I make rustic Italian bread without a wood-fired oven?
What type of flour is best for authentic Italian bread?
How long does it take to make rustic Italian bread from scratch?
Can I add herbs to my rustic Italian bread?
How do I store homemade rustic Italian bread?
Is sourdough considered a type of rustic Italian bread?
What’s the best way to achieve a crispy crust?
Can beginners successfully make rustic Italian bread?
What are some classic ways to serve rustic Italian bread?
Source Links
- https://baranbakery.com/italian-bread/ – Italian Bread
- https://shelfcooking.com/rustic-bread/ – Easiest Rustic Bread Recipe EVER | Simple & Delicious! – Shelf Cooking
- https://www.restlesschipotle.com/rustic-italian-bread/ – Homemade Rustic Italian Bread (Easy No Knead Recipe) – Restless Chipotle
- https://www.adventuresofanurse.com/crusty-italian-bread/ – Crusty Italian Bread
- https://myitalianflavors.com/baking/no-knead-bread-recipe-easy-pane-pugliese-recipe/ – No Knead Bread Recipe – Easy Pane Pugliese – My Italian Flavors
- https://www.linkedin.com/pulse/art-italian-bread-making-techniques-recipes-j46tc – The Art of Italian Bread Making: Techniques and Recipes
- https://www.kingarthurbaking.com/recipes/rustic-italian-ciabatta-recipe – Rustic Italian Ciabatta
- https://ourplantbasedworld.com/italian-artisan-bread/ – Italian Artisan Bread (Pagnotta)
- https://www.theperfectloaf.com/my-baking-tools/ – My Highly Curated Baking Tools | The Perfect Loaf
- https://www.onceuponachef.com/recipes/crusty-artisan-bread.html – Crusty Artisan Bread Recipe – Once Upon a Chef
- https://www.tasteofhome.com/recipes/mom-s-italian-bread/?srsltid=AfmBOoqulgiqS67dJBBE3wEdoYYoHMnHe3BimphYvSqDc7hIcw2B4pqG – Italian Bread
- https://www.farmhouseonboone.com/easy-sourdough-italian-bread/ – Easy Sourdough Italian Bread
- https://www.365daysofbakingandmore.com/grandmas-italian-bread/ – Grandma’s Italian Bread
- https://feelingfoodish.com/italian-bread/ – Easy Italian Bread
- https://www.ecorestaurants.com/news/behind-the-fascinating-and-delicious-science-of-sourdough – Behind the fascinating (and delicious!) science of sourdough — Eco Restaurants
- https://www.theperfectloaf.com/guides/how-to-autolyse/ – The Ultimate Guide to Autolyse Bread Dough | The Perfect Loaf
- https://www.theperfectloaf.com/guides/shaping-bread-dough/ – The Ultimate Guide to Shaping Bread Dough | The Perfect Loaf
- https://justmillit.com/crusty-italian-bread-fresh-milled/ – Soft and Chewy Crusty Italian Bread: A Must-Try Recipe
- https://ttitalian.com/italian-cuisine/breaking-bread-the-significance-of-freshly-baked-loaves-in-italian-dining/ – Breaking Bread: The Significance of Freshly Baked Loaves in Italian Dining – Trattoria Toscana
- https://www.sourdoughsymphony.com/stream/sourdough-ciabatta/ – Master Sourdough Ciabatta: The Ultimate Guide to Homemade Italian Bread
- https://thebreadrecipes.com/recipe/homemade-rustic-crusty-italian-bread-recipe/ – Homemade Rustic Crusty Italian Bread Recipe – The Bread Recipes
- https://cookingwithmammac.com/no-knead-italian-bread/ – No-Knead Italian Bread
- https://www.tasteofhome.com/recipes/mom-s-italian-bread/?srsltid=AfmBOoq75zzHZVqfPFtz16lx3nqTJ23TAPXFCuSaSHLYcBTwu94dTiV4 – Italian Bread
- https://medium.com/@lynn_26947/what-are-some-interesting-facts-about-italian-bread-b078e8d3e88c – What Are Some Interesting Facts About Italian Bread?
- https://medium.com/@lynn_26947/what-makes-italian-bread-different-from-regular-bread-318af6fa9724 – What Makes Italian Bread Different From Regular Bread?


